A MULTI-BAND END FED HALF WAVE (EFHW) AERIAL FOR SOTA
As a super simplistic aerial option the End Fed Half Wave (EFHW) aerial just about takes the biscuit. Being fed directly from one end and with, potentially, no need for a counterpoise the EFHW is as simple and as light as an aerial can get. When operating Summits on the Air (SOTA) I typically use a linked dipole as this gives me multi band flexibility without the need to carry an Aerial Tuning Unit (ATU) and patch leads. Using, say, 10m of RG147 as a coax feeder this is actually a pretty light solution but as I scale down my radio size to using Mountain Toppers I wanted to similarly scale down my aerial weight.
Report comparing this EFHW with a dipole
My early experiments to make an EFHW (to use on a kayak) were not particularly successful. Being monoband was a bit limiting although this could easily be fixed by adding links like my linked dipole. The real problem was how sensitive the aerial was to the surroundings; its proximity to the ground and to my body seemed to have a significant impact on the tuning/SWR and as the aerial moved in the wind the very narrow tuning range shifted up and down by 10s if not 100s of kilohertz. The other problem I had was finding a tree high enough to slope a 40m version of the aerial from as I normally only carry a 10m telescopic fishing pole.
Three discoveries really made the EFHW a viable reality for me;
1. Feeding the EFHW wire with a 1:50 – 1:60 impedance transformer (unun) instead of an EFHW tuner incorporating a capacitor makes it far less sensitive to the environment stopping the SWR from varying wildly.
2. Adding super lightweight Pico Traps from SOTABeams gives multiband performance without the need for a tuner and without the need to drop the aerial back down to ground level to change band.
3. The EFHW can effectively be deployed like an inverted V which means a 40m EFHW can work with a 6 -10m telescopic fishing pole. This facilitates elevation of the aerial where deploying as simple sloper may have left it hanging close to the ground.
The Unun
I found guidelines on the impedance transformer or unun on the website of PA3HHO who, in turn, had gathered a lot of experience from others on the Dutch forum zendamateur.com. I wont discuss the build options other than to detail exactly what I built.
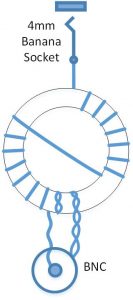
I used 22SWG/0.71mm enamelled wire on an FT50-43 toroid.
For the first two turns the primary and secondary winding are twisted together and thus the primary has just 2 turns. The secondary then has a further 7 turns before passing across (and through) the toroid for a further 7 turns wound in the opposite direction.
Note that the number of windings will depend on your toroid and aerial so some experimentation may be required. You're aiming for an impedance ratio of about 1:50 to 1:60 to match your 50Ω unbalanced transceiver output to your ~2500 - 3000Ω EFHW aerial.
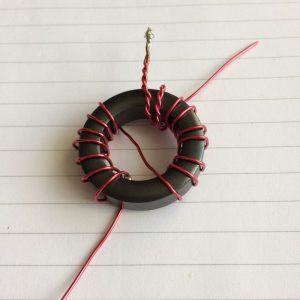
My first experiment using a large toroid
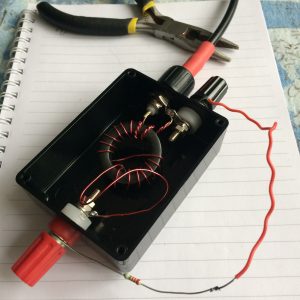
Mk1 prototype to test the basic unun matching. Here being tested by placing a 2k5 to 3kΩ resistor across the output and ground and checking the impedance of the input using the SWR analyser.
I initially built the unun using a ferrite toroid that I had to hand. Note that an iron core toroid will have different characteristics and require more winding to get an equivalent match.
Once I had tested the concept and found it to work I then scaled the design down using an FT50-43 toroid (thanks Pedro, CT1DBS) and a Hammond miniature plastic enclosure; 50mm (h) x 35mm (w) x 20mm (d).
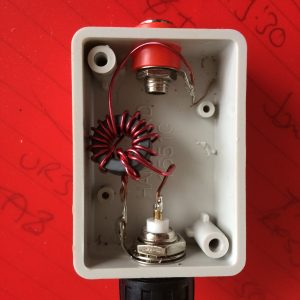
Mk2 unun build, this time scaled down in size to be super small and light.
Installed in a 1551GFLGY Hammond Enclosure
20mm x 50mm x 35mm (Flanged)
To give a general idea of the tuning range of the unun I attached a 3kohm resistor across the output and took the following SWR/impedance measurements across the useable HF band:
| Band | SWR | Z (ohms) |
|---|---|---|
| 80m | 2.3 | 30 |
| 60m | 1.9 | 34 |
| 40m | 1.7 | 35 |
| 30m | 1.6 | 36 |
| 20m | 1.5 | 37 |
| 17m | 1.5 | 37 |
| 15m | 1.6 | 36 |
| 12m | 1.7 | 36 |
| 10m | 1.8 | 38 |
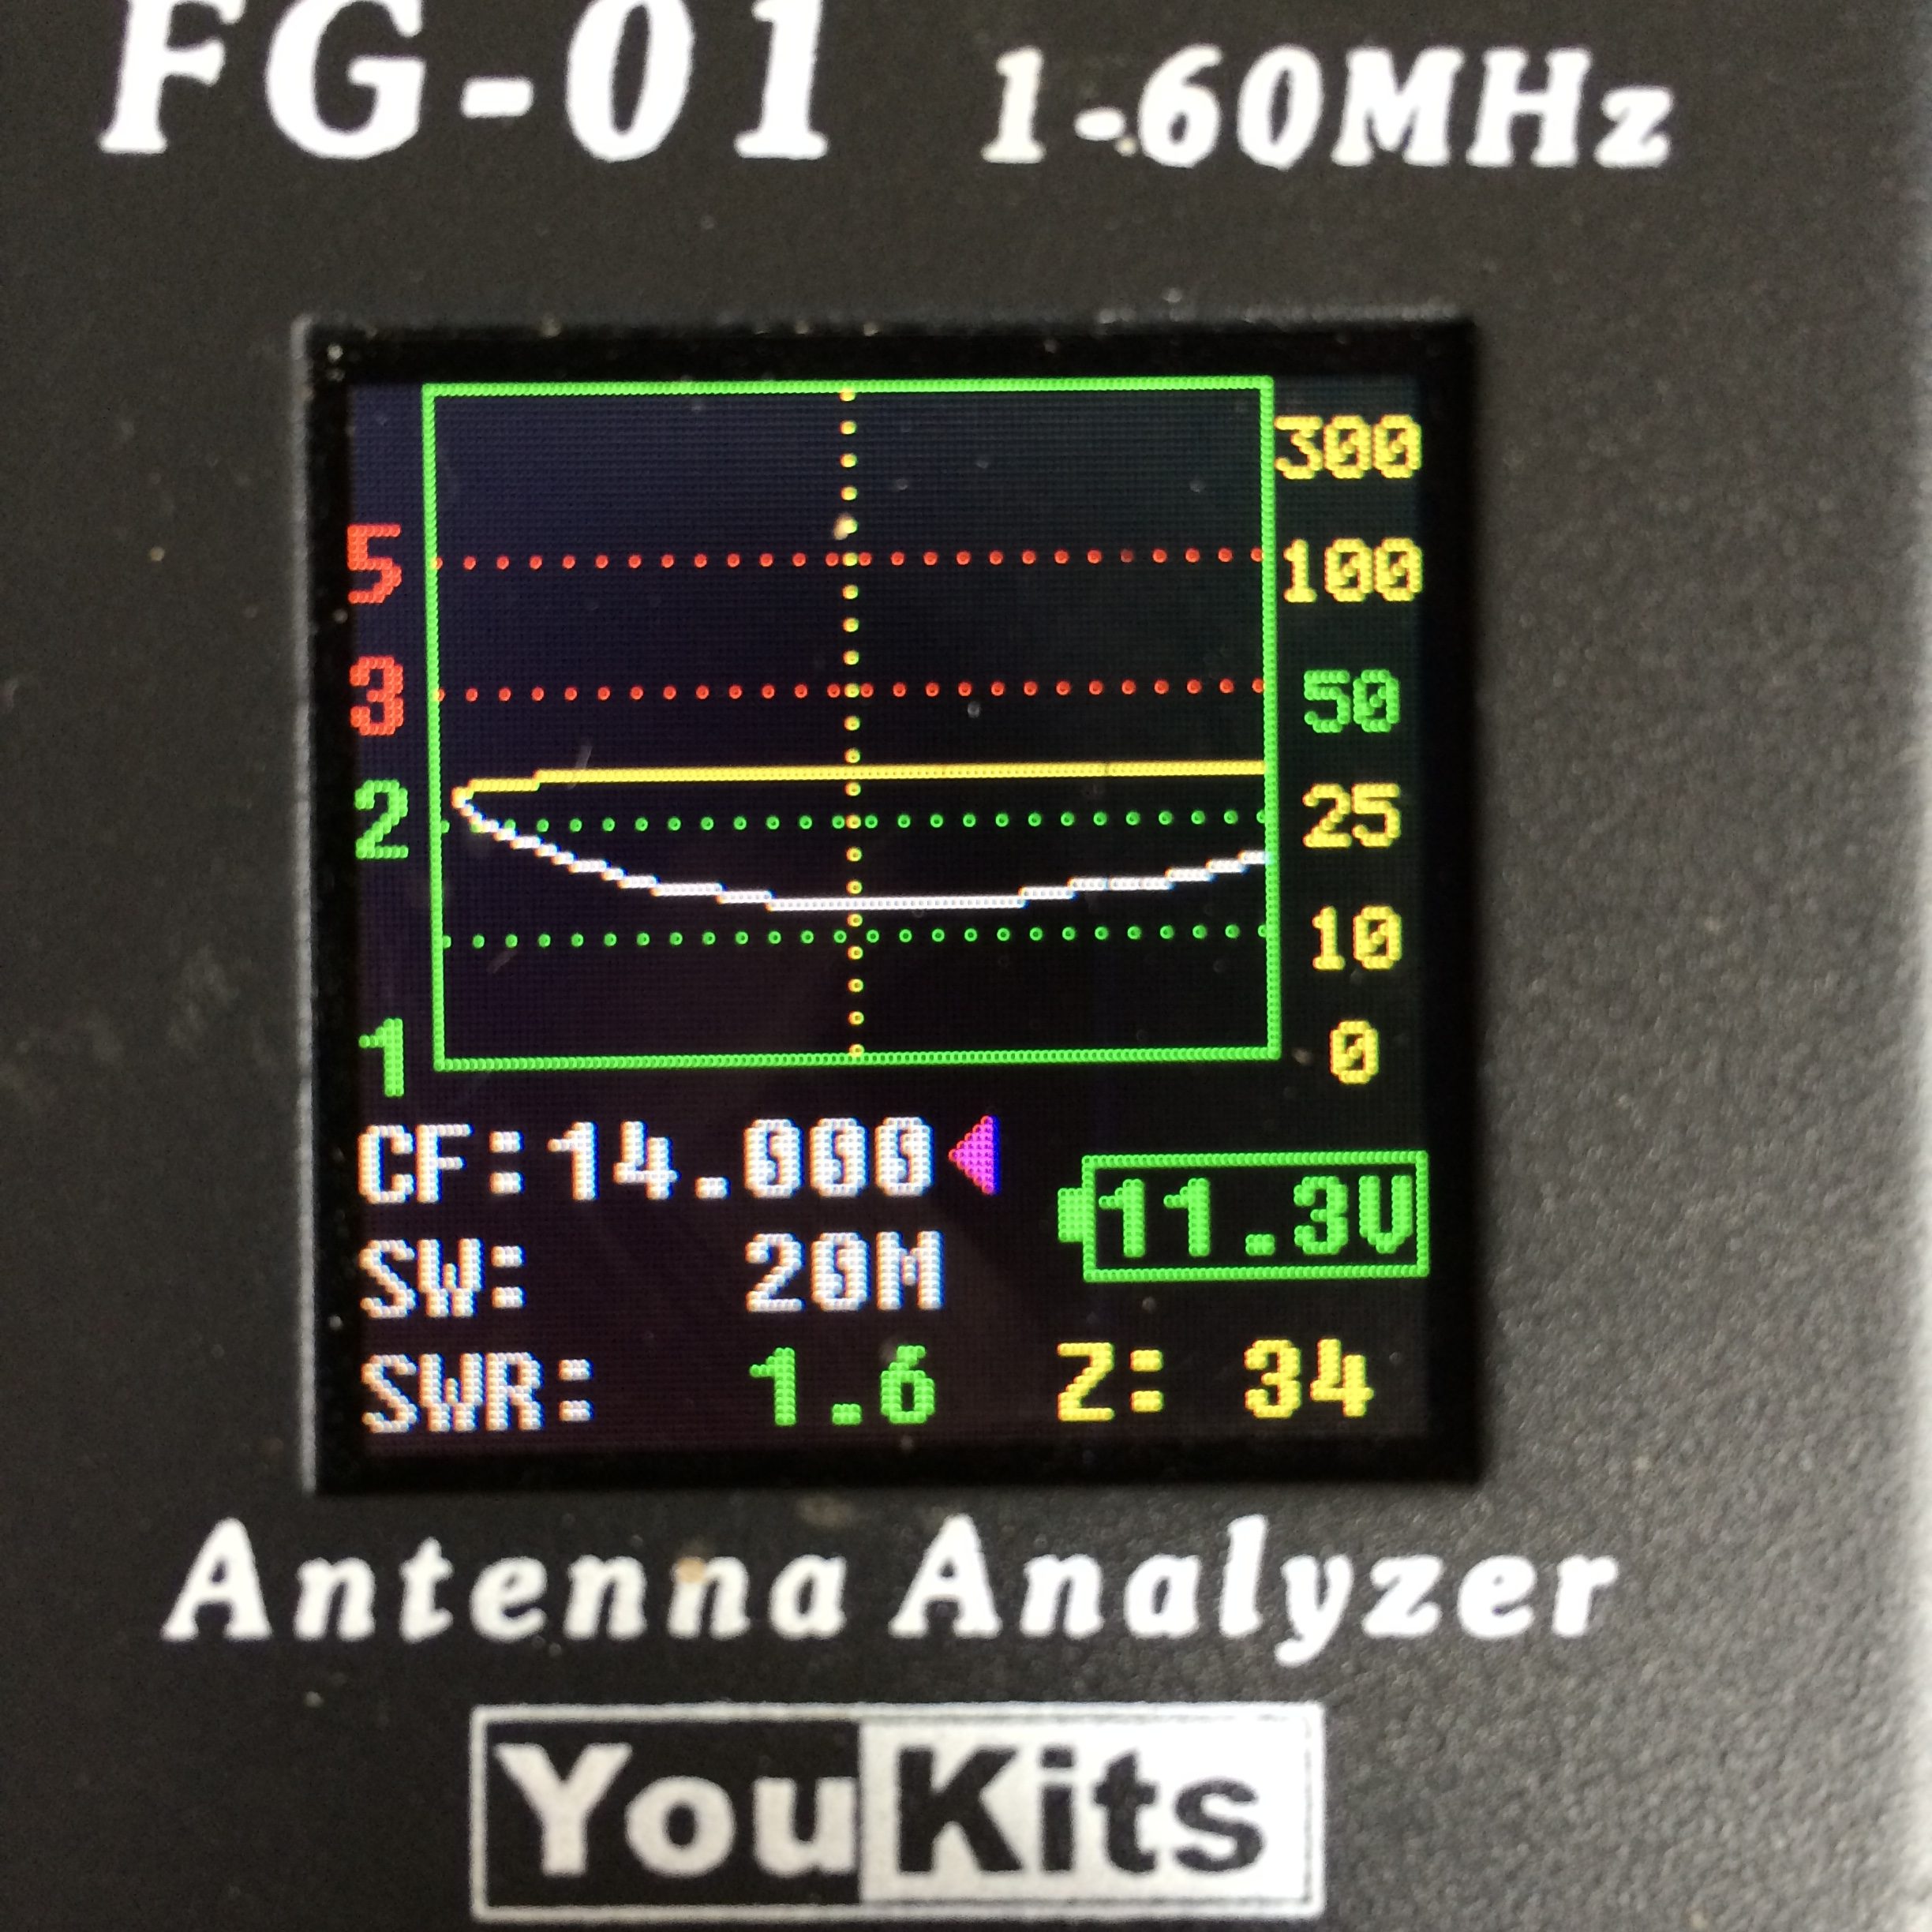
A view of the matching across HF bands
(4 - 28MHz)
The Pico Traps
I had discovered Pico Traps while looking for options for a /A aerial. My linked dipole for SOTA activity had been built from a kit from SOTABeams. This is great for /P operation where you often only activate one band and where dropping the aerial to make/break links isn’t a problem. However, when on holiday I wanted a similar triband dipole (20/30/40m) that I could erect for a week and not have to touch. SOTABeams produce a number of trap options for different power requirements but the Pico Traps are tiny, super lightweight and perfect for a QRP operator like myself.
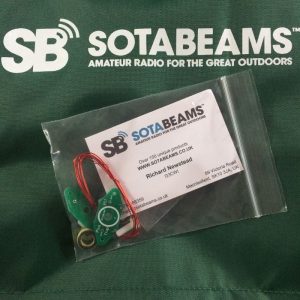
I wanted my EFHW to be multiband and opted to not go with a 'linked' arrangement so I bought a pair of Pico Trap kits from SOTABeams. The kits come with two small PCB predrilled to form a link in your aerial, two T50-6 toroids, some enamelled wire for the winding, two 100pF surface mount capacitor and a pair of nylon screws and nuts to hold the toroids firm on the PCB. Instructions on the build are downloaded from the SOTABeams website and construction takes less than an hour. Don’t let the inclusion of a surface mount capacitor put you off…I used a standard small tipped soldering iron at about 15W to solder these onto the PCB holding them in place as I do with a pin.
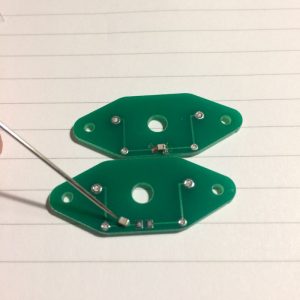
Once soldered into place I check all is OK by using something that can measure capacitance…in my case, the excellent Peak LCR45.
Winding toroids is pretty simple and the kit has plenty of wire. Just chop it in half and use the guide in the instructions to determine how many turns to put on your toroids. I wanted to build a 20/30/40m EFHW so I needed to make traps for 20m and 30m. From the instructions, I wound one toroid with 17 turns (14MHz) and the other with 22 turns (10.1MHZ) and then used a cigarette lighter to burn off the insulation and emery paper to clean up the tails.
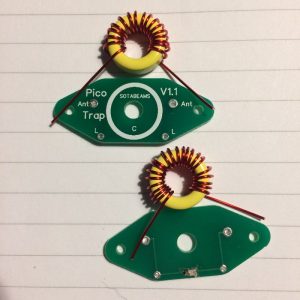
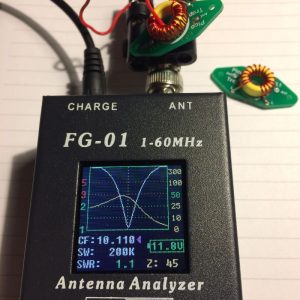
The toroids are soldered into place on the PCB aligning the centre of the toroid over the hole in the PCB. Before fitting the nylon screws one must first align the traps so that they are on frequency. This is most easily done if you have an aerial analyser with a graphical display. I used a BNC to binding post adaptor and then used a single piece of wire connected across the binding posts and through the centre of the trap to be tested. In my case I was aiming for the pronounced null to be at about 14MHz and 10.1MHz and I gently squeezed the turns together or spread them further apart on the toroids to achieve this.
The Aerial Elements
I started by calculating the basic lengths of a halfwave at 20, 30 & 40m simply using an online tool (lazy!).
These measurements were my starting points for creating the aerial:
| Band | Half wave length (m) | Section lengths (m) |
|---|---|---|
| 20m | 10.15 | 10.15 |
| 30m | 14.1 | 3.95 |
| 40m | 20.3 | 6.2 |
*** these were my starting lengths, not the final cut lengths of my aerial elements ***
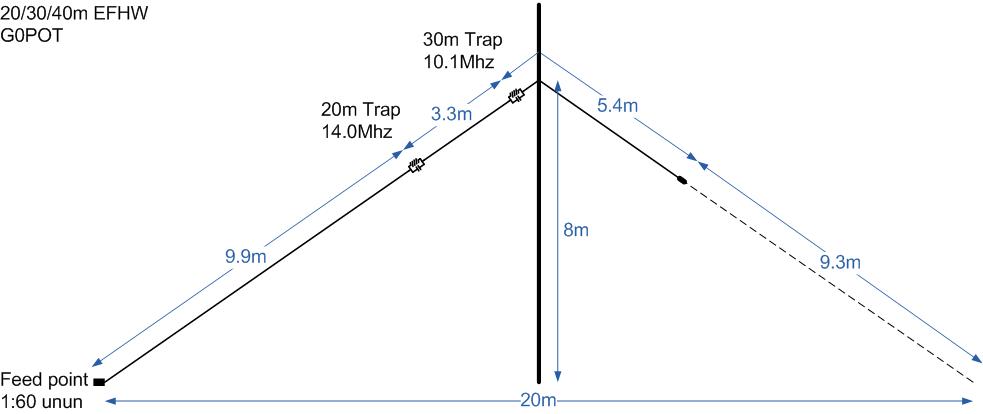
I decided the finished aerial would be used in an inverted V format using my 10m travel pole from SOTABeams. I fixed the end of the wire at about 8 to 9m up the pole (not using the particularly flexible tip), connected it to my unun and trimmed until it tuned in the CW end of 20m nicely.
I then connected the far end of this wire to my 20m/14MHz Pico Trap using a bowline knot in the wire and soldered the end to the trap. On the other side I used a bowline knot to connect the 3.95m section and hoisted it back up the pole to test the tuning. It was tuned low, about 9.5MHz so too long…more trimming got this closer to 10.1MHz. You’ll see in the pictures at the bottom of the page that the bandwidth is quite broad.
Finally I used bowline knots again to attach the 10.1MHz trap to the end of the aerial and attached the final 6.2m element for 40m. My aerial was now looking more like an inverted V and tuned to about 6.5MHz so I had to trim quite a lot off to shift that tuning up to the CW end of 40m.
My final element lengths are shown here with the basic dimensions of my mast and the additional guy line to create the overall aerial.

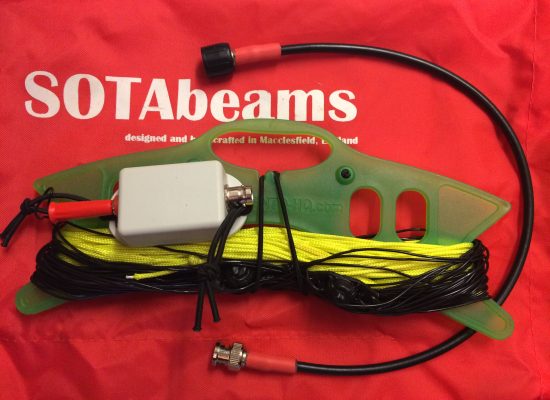
To complete the aerial I fitted a banana plug to the end to plug into the unun and used liquid electrical tape to coat the Pico Traps in a waterproof/protective layer. The whole aerial including traps, plug and wire winder weighs in at 140g. Adding the unun and a short length of coax to connect to the radio brings the whole aerial system up to a grand total of 200g.
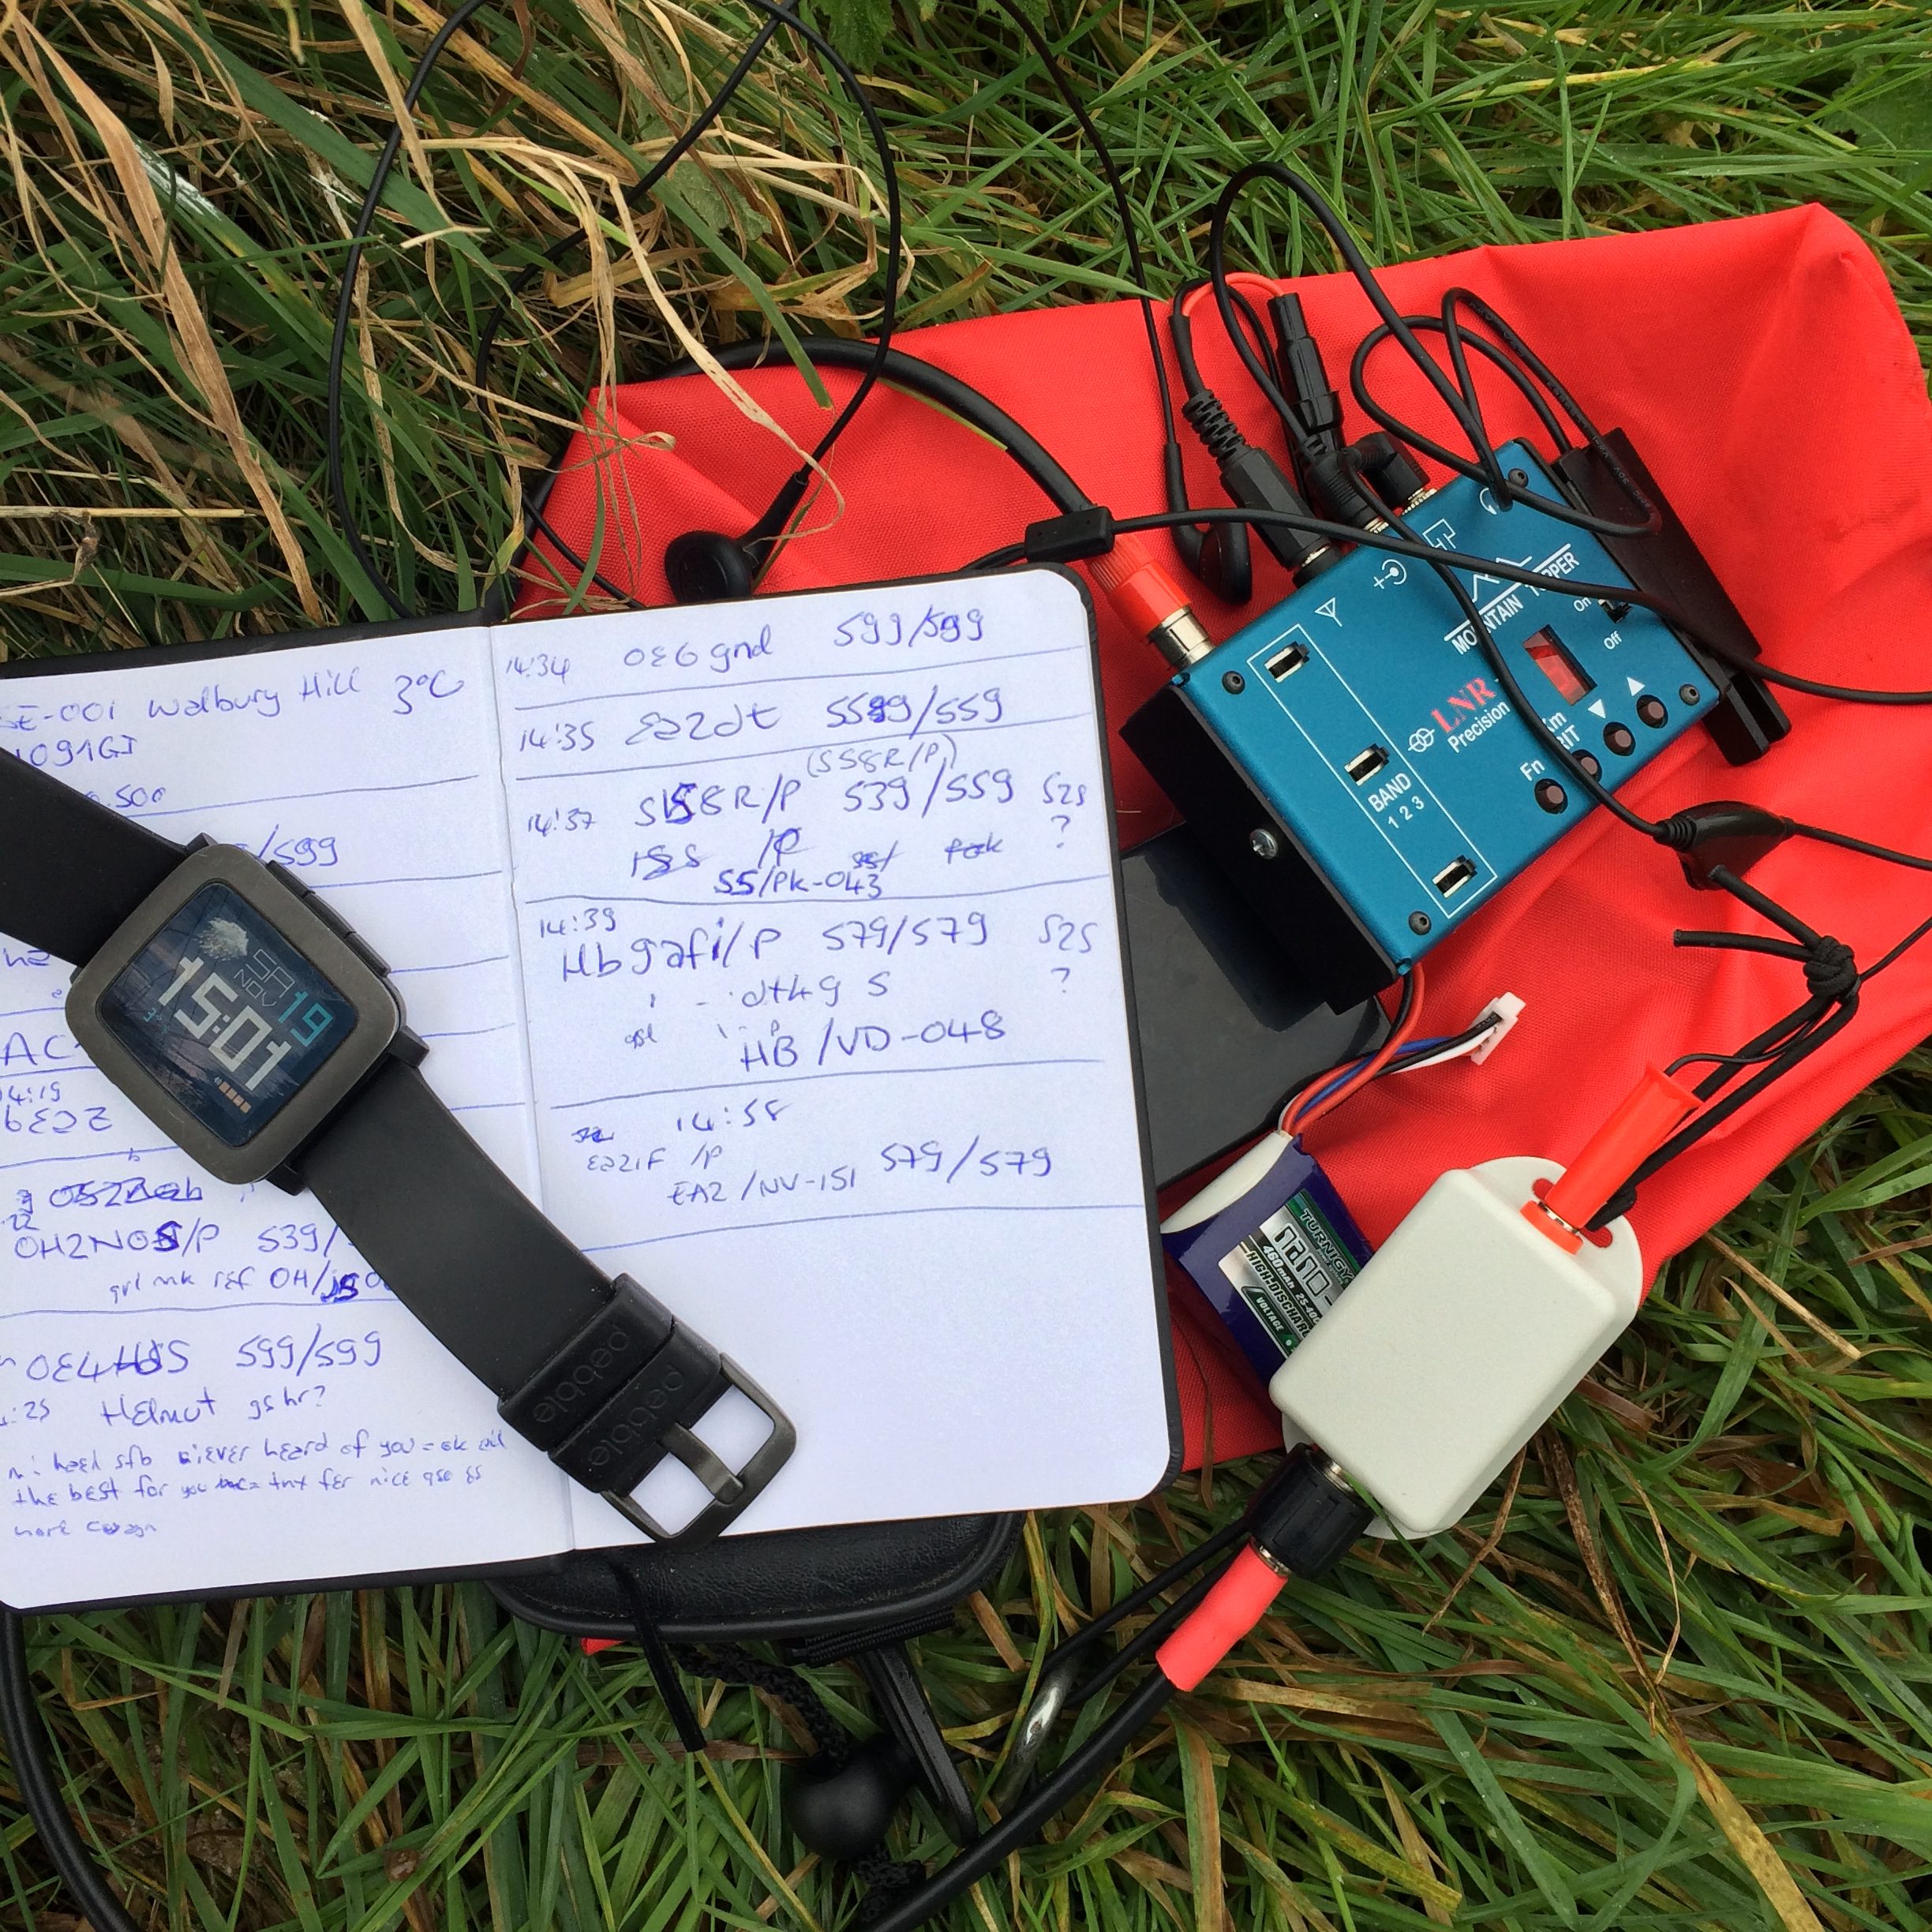
The EFHW in use on a SOTA summit with MTR3B. Worked USA and 4 summit to summit contacts on 20m :o)
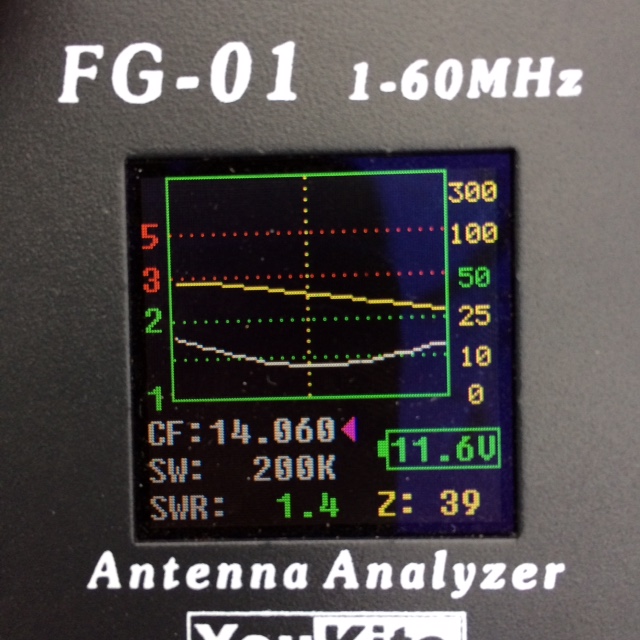
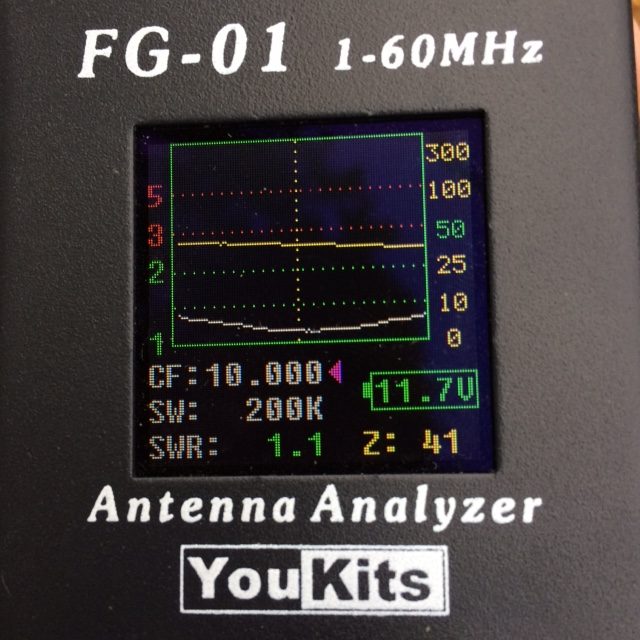
20m & 30m look good on the aerial analyser. 40m still needs some trimming!
Other Ham's Experiences
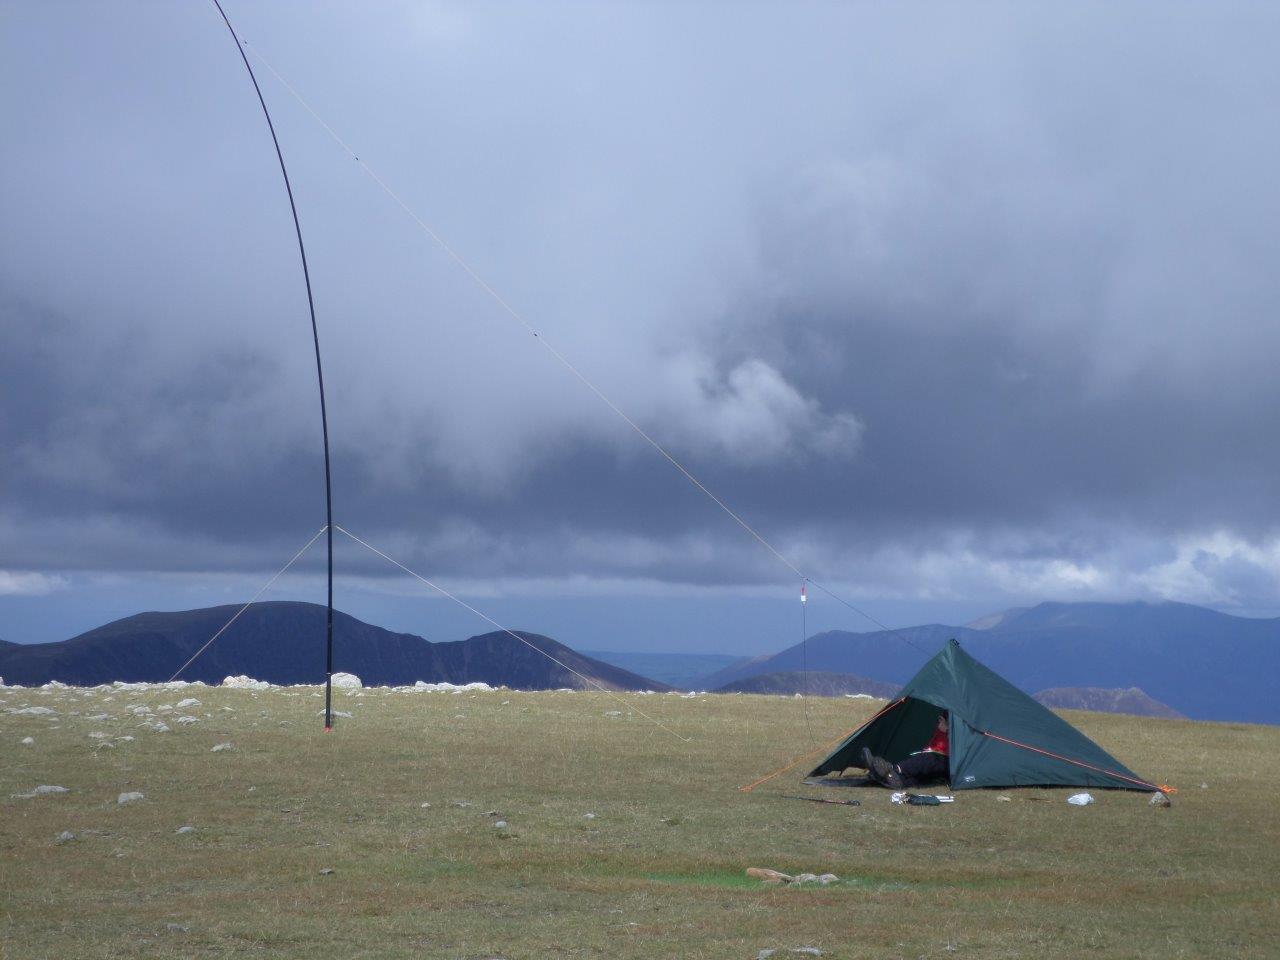
Andrew (2E0GEN) in the field using his EFHW with elevated feed point
Andrew (2E0GEN) reports the following interesting observation in regards to elevating the feed point:
"With respect to the EFHW feed point position near the ground, the SWR improved from 1.5:1 down to 1.2:1 by elevating the feed end. I put it up first (15 cm from ground) and could not work out why the swr was higher than my original tests so I slackened the feed point end and tightened the guy line at the 40m end of the efhw to raise it up to about 1.5m. Bingo it came right down. Because the mast is so flexible there is bags of adjustment which can be done".
Copyright © 2016 Michael (G0POT)
25 thoughts on “EFHW”
This is a great design of a superb portable antenna. I have an SW-3B with the same .three bands covered by the antenna and radio.
I made my own traps on small pieces of GRP boards, and protected them with heat shrink, and put the transformer along with a ferrite bead choke in a small box. Banana plugs & sockets provide interconnection, whilst a small (~2m) counterpoise is preferred over using the feedline.
Irrespective of where I’ve installed the antenna, it’s match is consistently spot on every time. I usually carry the NanoVNA with me, but never had to make any in-field adjustments.
God work Michael.
De G4MAD
IMHO the best portable antenna for SOTA/HEMA/POT etc.
Hi Michael. Just wondered if putting a switch with the un-un to give different taps is a good idea.
I haven’t found a need to modify the impedance offered by the basic winding described above. I found that this provided a match to half wavelengths of wire for most of the HF bands although I concede I haven’t tried them all. I think the feed point impedance of most HF half wave wires will be roughly equal so the unun should transform that to about 50ohms.
Hi Michael,
Fine description.
Do you actually need the 20m trap ? The 20 m long wire (shortened by the 30 m trap) should also resonate on 20m as a full lambda.
Did you try that ?
Best regards .
Georges F6DFZ
Hi Micheal,
I have watched your you tube videos many times and am very impressed with your results,i gave a demo to our club in the summer 2 years ago outside the clubhouse using an mtr 3b with a tiny battery and efhw aerial on 40 and in the spate of 40 mins worked belgium,holland germany italy and sweden so much for the synick who said when he saw my setup”youll get no where with that”pleased to say the proof was there in all its glory for all to hear,i was decoding the cw as theres 60 members only 3 profiecient cw ops.Ive followed your instructions for the trapped version and yet to use it awaiting warmer weather.keep up the good work.regards Dave G0AYD.100% CW SINCE 1992.
Keep encouraging your members to try a bit of CW…it’s a great skill to have. Be sure to come back and share your experiences with your tri-band EFHW. Good or bad I’d love to hear how you get on.
Hi Michael,
Thanks for the clear descriptions. Two questions:
1) if I just lop off the radiator at 9.9m and forget about the traps, will I have a tuned 20m monoband EFHWA ? (I.e. , one that doesn’t require an ATU to make SWR?)
2) What if I stick a random length of wire (say, a non-resonant length in the 40′ range) onto the unun? Can I tune that into a multiband antenna with an ATU?
I’ve always used longwires in my 100W ops (real longwires, without coax feeds), but that requires a serious antenna tuner, and ideally an artificial ground, both of which are three or four times larger than the QRP transceivers I’m getting into now. If the unun described above would allow me to get by with a little QRP tuner, that would be a big help.
For that matter, it might also be useful at 100W to my bench tuners, because some bands just don’t tune up on some wires, even with all that muscle.
Thanks!
Rob
KB7PWJ
Yes, the little impedance matcher simply aims to match the impedance at the end of a half-wave length piece of wire (which is in the order of 2.5 – 3k ohms) to your 50 ohm transceiver aerial connection. So you could add any half-wave length and the impedance matcher would work for that band to make a simple mono band aerial. For 20m start a little longer at, say, 10.1m…the trap may have artificially shortened my first element to 9.9m.
A random length of wire (~41′ is a good length for 20/30/40m on my KX1) will present a range of impedances depending on the frequency. Typically for random wires we go out of our way to avoid half-wave lengths so that, for a range of bands, the impedance doesn’t change too drastically. If you struggle to tune a particular length at a particular frequency then, yes, its possible adding an impedance matcher like this could help get a closer match to your 50 ohm and take some of the strain off the ATU. It’s not something I’ve ever tried so if you do it, please come back and let us know if it worked :o)
Michael (G0POT)
For a random wire (avoiding half waves), you really want a 9:1 unun rather than a 49:1 or 64:1 which is used for a half wave. Then you can use a tuner.
Hi Michael…first, thanks for your YouTube videos …. I’ve watched them more than once…actually many times….and enjoy the thoroughness you provide…..I say this because as a ‘relative’ newbie….not-technical ham…as a new retirement hobby…watching them is how I am learning about portable operation…which is my main interest.
I would like to ask what are YOUR favorite portable HF antennas today for the MTR or other peanut-power radios. I ask because I am always trying to find the best balance between efficiency (to get max power out into the ether…), and ease of setup and carrying….I am focused on being able to go for a few days hike with minimalist HF equipment…and finding that ‘perfect’ (elusive) antenna has taken up hours of reading, watching, thinking time…
So…now that you’ve had the transformer/trapped-EFHW….I am very curios where that “stands” in your ranking of favorite portable/SOTA antenna…
Thanks again for all you provide…
72, Jim AC3B
Emailed direct but for others reading this the summary was…
The EFHW is now my 1st choice aerial for all SOTA operations and most /P operations.
My grab and go SOTA station now consists of:
– MTR3B (or the MTR5B)
– Palm Radio Pico Paddle
– 460mAh LiPo battery
– Headphones (earbuds)
– 10m travel pole (SOTABeams), I have long Velcro straps attached to wrap around fence posts.
– 3 band EFHW (using SOTABeams PicoTraps) wound on a kite-line winder with 50cm of RG58. I also carry a single guy in case there are no fence posts to strap the mast to. I use the EFHW as two of my guys and the piece of string as the third.
– Comfy seat :o) (I’m using the Helinox Ground chair which is light, packs down small and is comfortable)
– Notebook and pencil
Michael (G0POT)
On your YouTube video about the SOTA WSPR device, there is a nice looking 40m tubular dipole. Would you share the details please?
It’s the rather excellent travel mast from SOTABeams, https://www.sotabeams.co.uk/compact-light-weight-10-m-30-ft-mast/
A little expensive but perfect. I’ve been using mine for a few years now so pretty robust.
Hi Michael
Did you video the build at all or would you consider doing one, if one wanted to build an nun with the same ratio for 100w is it a simple case of scaling up the toroid and the wire size ?
Keep up the good work !
Hi Michael,
Just to let you know, I made one using 2×240-43 cores and I’m now using this at my home QTH for 80m-40m where it is very effective even upto 400w with no common mode currents into the shack due to 15 turns of MINI8 around another 240 core. Its centered on 40m as a full wave and below 2 on 80-75 meters and works great. Also it tunes on most other bands but is not as efficient or effective on 20m (for example) as my 20m resonant EFHW with an LC tuned circuit. However, I’m a convert to the EFHW. I really should make the one for the KX2.
Chris
M0VUE
Hi,
Is the resistor fitted in the scaled down version just for testing purposes shown in the photo? Would this antenna work on 10m as a full wave?
Andy, just replying here for anyone with similar questions :o)
Yes, the resistor is just fitted just to check that the input sees a ~50ohm impedance across the desired frequency range. The ~3 kilohm resistor simulates the impedance of a half-wave aerial and then I used my Youkits aerial analyser to check that the SWR/impedance looked good across the 7 – 20MHz range that I want to use it for.
The feed point impedance of a 10m full wave aerial will be significantly different to a half-wave and therefore the unun will be unlikely to help (we confirmed this later…my set up does show a dip in SWR around 30MHz but ot sufficient to operate without an ATU).
For experimental reasons I built an 1:64 UNUN with 2 primary turns on two stacked FT240-43s with taps at the 8th, 10th, 12th and 14th secondary turn, so I can plug in the antenna wire for 1:16, 1:25, 1:36, 1:49 or 1:64 impedance transformation.
With my 80m EFHW wire cut for lowest SWR when plugged into the 1:64 jack I get a perfect match on 40m (end fed full wave in this case) when plugging it in for a 1:25 transformation – however the antenna is wildly zig-zagging in close proximity to the building, part of it is even in the attic, so other setups may return different results.
73, Eva, DL3IAK
Thanks for describing that…I hadn’t considered tapping the UnUn…a very interesting idea which I’ll be trying when the weather gets warmer. If you have posted pictures of your build anywhere let me know.
sadly no published pics, sent you some via email.
great article
Thanks John…this EFHW has proved a very effective aerial for portable/SOTA QRP use. Hopefully I’ve captured enough info here for anyone to copy the design :o)
Hi Michael,
Thanks for the reply, that should suite my KX2 very well then, I’ll get on and make onw this weekend.
Hi,
Just wondered what the windings are on your MK2 unun and also how much power do you run SOTA?
Chris, the mk2 unun has exactly the same number of turns as the mk1…it’s simply made on a smaller F50-43 toroid using the same gauge wire as the mk1 and my aerial wire is 7×0.2mm stranded wire so super thin and light.
I typically run between 3 – 5W for CW on a SOTA summit using radios like the MTR3B and MTR5B but sometimes I do a little SSB using the KX3 in which case I may push it up to 10W. That’s netted me Australia in the past!
Michael (G0POT)